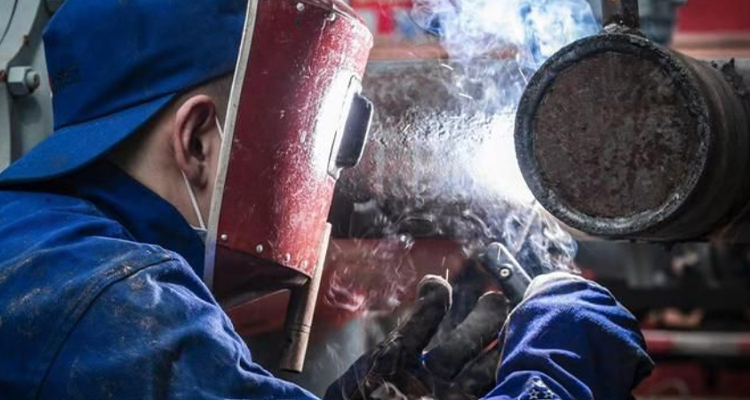
Why TIG Welding Deserves Your Attention
TIG welding (Tungsten Inert Gas welding, also known as GTAW – Gas Tungsten Arc Welding) stands apart as the aristocrat of welding processes. While it may not be the fastest or easiest method, it delivers unparalleled precision and creates welds of exceptional beauty when mastered. For projects where quality and appearance cannot be compromised, TIG welding is often the only acceptable solution.
The versatility of TIG welding makes it indispensable across numerous industries:
-
Aerospace engineering: For critical components where failure is not an option
-
Automotive fabrication: Particularly for custom exhaust systems and roll cages
-
Food and beverage equipment: Where sanitary welds are essential
-
Artistic metalwork: Creating stunning sculptural pieces
-
Bicycle manufacturing: Joining thin-walled tubing with precision
-
Motorsports: Where strength-to-weight ratio is crucial
While MIG welding might be the recommended starting point for beginners, TIG welding represents the natural progression for those looking to elevate their craft. The skills required are more demanding, but the results are well worth the investment of time and practice.
Understanding the TIG Welding Process
At its core, TIG welding creates fusion through an electric arc established between a non-consumable tungsten electrode and your workpiece. What distinguishes TIG from other processes is the remarkable level of control it offers and the pristine results it can achieve.
The Key Components of TIG Welding:
-
Tungsten Electrode: Unlike other welding processes, the electrode doesn’t melt and become part of the weld. Instead, it merely conducts the electrical current to create the arc.
-
Inert Gas Shield: Typically argon or a helium-argon mixture flows through the torch to protect the weld pool from atmospheric contamination.
-
Optional Filler Rod: Fed manually by the welder’s other hand when needed (though autogenous welds—with no filler—are possible on thin materials).
-
Precise Heat Control: Often managed through a foot pedal, allowing real-time adjustments during welding.
The combination of these elements creates a process that can join the thinnest materials with exceptional control and minimal heat-affected zones.
Essential Equipment for TIG Welding Success
Setting yourself up for TIG welding requires investment in quality equipment. Here’s what you’ll need:
The Welding Machine
Modern TIG welders come in various configurations, but for beginners, look for these features:
-
AC/DC capability: AC for aluminum and magnesium, DC for steel, stainless steel, and most other metals
-
High-frequency start: Allows arc initiation without contact (protecting your tungsten)
-
Pulse capability: Helpful for controlling heat input on thin materials
-
Adjustable post-flow: Ensures proper gas coverage during cooling
-
Duty cycle rating: Higher percentages mean longer continuous welding time
Torch and Consumables
-
TIG torch: Available in air-cooled (for lower amperage) or water-cooled (for higher amperage) versions
-
Tungsten electrodes: Various types available, including:
-
Pure tungsten (green) for AC welding of aluminum
-
Thoriated (red) for DC applications (though being phased out due to slight radioactivity)
-
Lanthanated (blue or gold) for excellent all-around performance
-
Ceriated (orange) for low-amperage work
-
Collets and collet bodies: Must match your tungsten diameter exactly
-
Ceramic cups: Available in different sizes to match your application
-
Gas lens kits: Improve gas flow and extend tungsten stick-out for better visibility
Filler Materials
-
TIG filler rods: Must be matched to your base material:
-
ER70S-2 or ER70S-6 for mild steel
-
ER308L for stainless steel
-
ER4043 or ER5356 for aluminum
-
Silicon bronze for dissimilar metals
Essential Safety Gear
TIG welding requires all standard welding safety equipment, plus a few specialized items:
-
Auto-darkening helmet: With adjustable shade settings (typically 9-13)
-
TIG-specific gloves: Thinner than standard welding gloves for better dexterity
-
100% cotton or flame-resistant clothing: No synthetic materials that can melt
-
Proper ventilation: Even though TIG produces less fume than other processes, ventilation is still critical
Mastering TIG Welding Technique: Step by Step
The journey to TIG welding mastery involves developing muscle memory, coordination, and an intuitive understanding of the molten puddle. Here’s how to build your skills methodically:
1. Setting Up Your Workspace
Before striking your first arc:
-
Position yourself comfortably: Proper ergonomics are crucial—you’ll need steady hands
-
Arrange for proper lighting: You need clear visibility of the weld puddle
-
Secure proper grounding: Essential for consistent arc performance
-
Clean your materials thoroughly: TIG welding has zero tolerance for contaminants
2. Preparing Your Tungsten
Proper tungsten preparation dramatically affects your results:
-
Grinding direction: Always grind longitudinally, never circumferentially
-
Tip shape: For DC welding, grind a taper approximately 2-2.5 times the diameter length
-
Dedicated grinding wheel: Use a tungsten-specific grinding wheel to avoid contamination
3. Mastering the Fundamentals
Start with basic practices to build your foundation:
-
Practicing arc starts: Begin by simply establishing and maintaining a steady arc
-
Running stringers: Create straight beads without filler on scrap material
-
Controlling the puddle: Learn to move and manipulate the molten pool before adding filler
4. The “Two-Hand Dance”
TIG welding’s signature challenge is coordinating both hands while controlling the foot pedal:
-
Torch hand: Maintains consistent arc length and travel angle
-
Filler hand: Introduces rod into the leading edge of the puddle when needed
-
Foot control: Adjusts amperage in real-time to control heat input
5. Perfecting Your Technique
As you progress, focus on these technical aspects:
-
Arc length: Maintain approximately 1/8″ (the diameter of your tungsten is a good rule of thumb)
-
Torch angle: Typically 15-20° from vertical in the direction of travel
-
Filler rod angle: Approximately 15-20° from horizontal
-
Walking the cup: A technique where the ceramic cup is used to glide along the workpiece, helping maintain consistent arc length

Common TIG Welding Mistakes and How to Avoid Them
Learning from mistakes is part of the process, but here are some common pitfalls to watch for:
Arc Length Issues
-
Too long: Creates wider, less focused heat, potential for porosity and contamination
-
Too short: Risk of tungsten contamination, insufficient gas coverage
-
Solution: Practice maintaining consistent distance; use your tungsten diameter as a reference
Contaminated Tungsten
-
Symptoms: Ball-shaped end, dark coloration, erratic arc
-
Causes: Dipping into the puddle, insufficient gas coverage, touching filler rod to tungsten
-
Solution: Immediately stop welding and regrind the tungsten before continuing
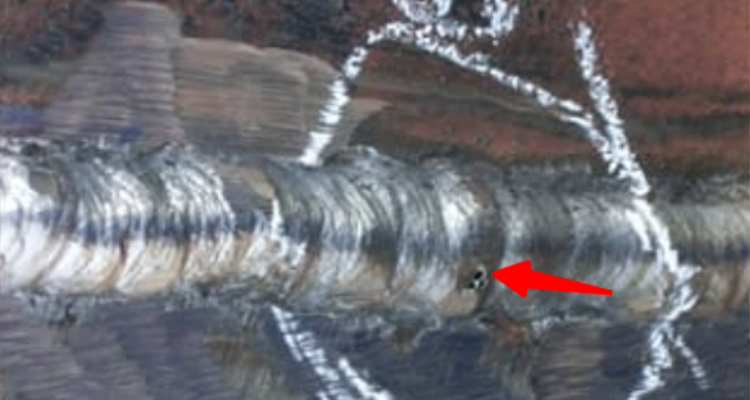
Poor Gas Coverage
-
Symptoms: Discoloration, porosity, brittle welds
-
Causes: Insufficient flow rate, drafts, leaks in gas system, wrong cup size
-
Solution: Verify gas flows, check for leaks, use appropriate cup size, shield from drafts
Heat Management Problems
-
Symptoms: Excessive melt-through or insufficient penetration
-
Causes: Incorrect amperage, inconsistent travel speed, poor foot pedal control
-
Solution: Practice heat control exercises, adjust machine settings, develop consistent rhythm
Advanced TIG Techniques to Aspire To
Once you’ve mastered the basics, these techniques will elevate your TIG welding skills:
Pulse Welding
Using machine-controlled pulses between high and low current allows better control on thin materials and helps overcome challenging positions.
Walking the Cup
A technique where the ceramic cup is rocked along the joint, creating rhythmic, consistent welds—particularly useful for pipe welding.
Lap Joints and Outside Corners
More challenging joint configurations that require precise heat control and filler addition.
Multi-Pass Welds
Building up thicker materials with multiple passes requires understanding of interpass temperature and proper bead placement.
TIG Welding Different Materials: What to Know
Each material brings its own challenges to TIG welding:
Carbon Steel
-
Current: DC electrode negative
-
Preparation: Thorough cleaning to remove mill scale and oils
-
Technique: Moderate travel speed, consistent filler addition
Stainless Steel
-
Current: DC electrode negative
-
Preparation: Clean with stainless steel brush only (to avoid contamination)
-
Technique: Control heat input to minimize warping and discoloration
-
Gas: Consider adding 2-5% hydrogen for cleaner welds
Aluminum
-
Current: AC with balanced or electrode positive-biased wave
-
Preparation: Clean with acetone and dedicated aluminum brush
-
Technique: Higher heat input, faster travel speed
-
Challenges: Heat conductivity and oxide removal
Remember: safety always comes first!If you need laser welding machine or other related professional equipment, please contact us
Conclusion
TIG welding represents both a technical skill and an art form. While the learning curve is steeper than other welding processes, the precision and quality it offers are unmatched. Whether you’re pursuing a professional career or enhancing your personal fabrication capabilities, investing time in mastering TIG welding will open doors to projects and possibilities that other welding methods simply cannot achieve.
Remember that expertise comes through practice, patience, and persistence. Start with simple joints on thicker materials before progressing to thin-gauge work. Document your progress with photos, and don’t hesitate to seek guidance from experienced TIG welders.